Log Cabin Block Instructions
Assembly Of Light And Dark Strips
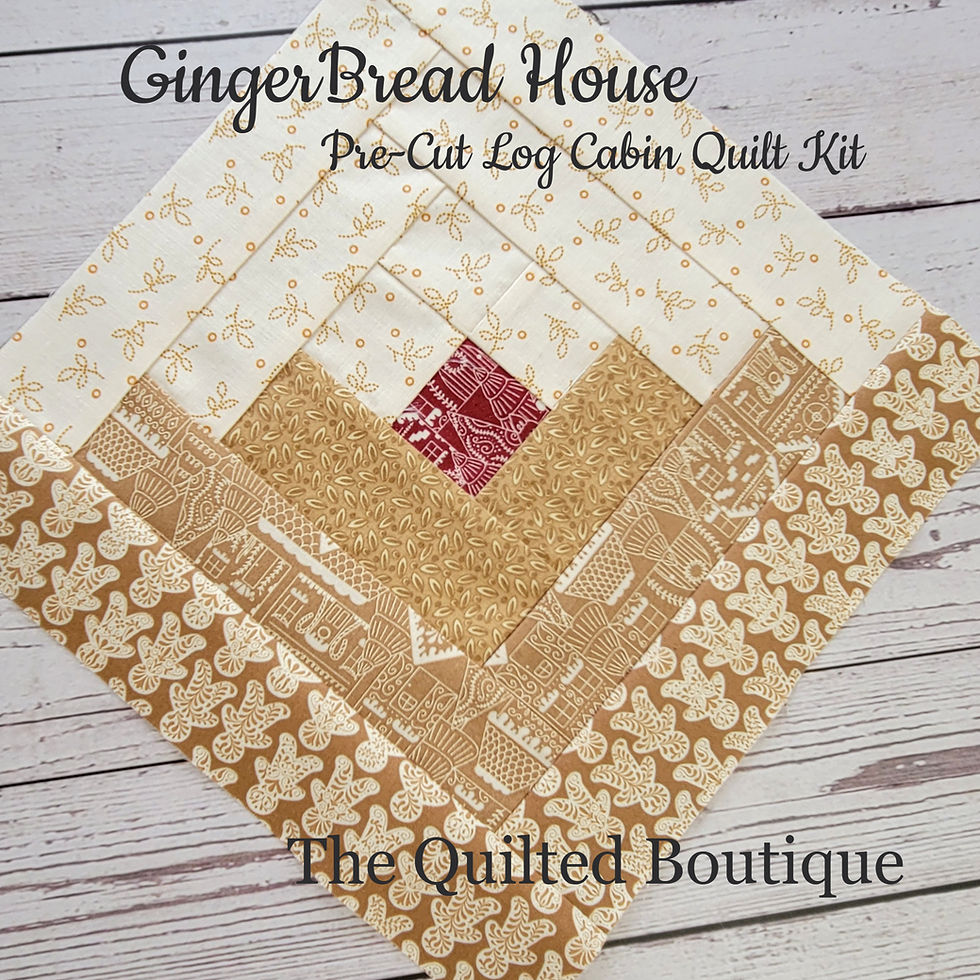
The Log Cabin Block arrangement is made up of 2 inch strips. The strips are added in a clockwise turn around the center ( you may chose counter clockwise, I prefer clockwise myself.)
Use a scant 1/4 inch seam allowance in the following order. ( see image ) We recommend A Stitch Length of 1.8 for longevity and stabilty of the quilt.
Step 1 - Center Squares
Start with the four middle blocks blocks Number 1 and Number 2, place the blocks right side together and stitch a scant 1/4 inch seam. open and press the seam toward the darker fabric.
Step 2 - Constructing blocks 3 and 4 this makes up number 3 in diagram
To Sew space 3 on to newly constructed block Take Two 2 Inch By 2 Inch Blocks, Sew These Together, Press Your Seam Opposite To Your Seam Construction On Blocks 1 And 2 This Will Help Nest Your Seams For Better Construction. This Makes Space 3 on above diagram Now Sew To constructed 1 and 2 blocks, Press your seams towards the piece with the dark block.Your middle is now made of 4 two inch pieces, rather than 3. This construction will give your quilt better strength in construction.
Step 3 - Rectangle Number 4
Add rectangle 4 onto the side of your project, refer to the diagram above to add your 4th strip in the correct order. (Notice that you turn your project 1/4 turn clockwise or counter clockwise with each strip addition)
Press Your Seam.
Step 4 - Rectangle Number 5
Stitch rectangle number 5 onto the final open side of your square, and now your first round is completed. You now have a formed square block.
Steps Forward - Repeat
Continue Sewing your strips onto your block as shown in the diagram above, in the same manner you have already done. Use a scant 1/4 inch seam throughout, and press as you go until your block has reached the desired size. In this case of the pre-cut kit you have purchased, your block will be completed at 10.5 x 10.5 inches.
As you add each strip be sure to press (or finger press) your seam with each addition. It is a good idea to have an iron handy so that you do not skip this step. As well when pressing try not to stretch your fabrics, simply press the seam open, do not drag your iron over and over a seam, as this tends to stretch your fabric. Try to press your seam to the dark fabric when possible so that your seams aren't visible from the front.
At times it is easiest to press your seams the way the fabric lays, if the fabric wants to lay to the left or right, I often press my seam in the direction the fabric wants to lay, this helps me keep a flatter block at the end of my sewing.
Step 5 - Square Your Project.
When you have sewn all rectangles to form your log cabin block, it is best to square up your finished block. Trim your block so that all corners are 90 degrees, and all sides are straight. This will ensure your seams match up when assembling your quilt top.
Step 6 - Finial Assembly
Your final assembly should be laid out on a flat surface, this will help you to see what placement appeals to you. There are many ways to arrange log cabin blocks to make an overall different quilt top pattern.
See this link to view the multiple lay out choices of log cabin blocks.
Should you have any questions, please hit that "Let's Chat" button off to the right of this page, and we can communicate instantly.
Happy Quilting friends,
The Quilted Boutique